The Only Guide To Applying Eyeliner That You'll Ever Need, From Top Makeup Artists

Even if you're not the type who's interested in more complex makeup looks, eyeliner is something of a standard go-to for most people when it comes to a makeup routine. When applied correctly, eyeliner can perk up your eyes by drawing attention to them. Better still, there's no end to the different types of lines you can create from winged to cat-eye to even the currently trending reverse cat-eye: Eyeliner is a versatile yet staple makeup item that should be in everyone's cosmetics bag.
But if you're not quite sure how to nail a cat-eye line or how to achieve the perfect winged eye if you have hooded eyes, then you're going to appreciate this simple crash course, which proves that applying eyeliner doesn't require a degree in physics or taking a YouTube influencer's master class. Oh, and if you're curious—feel free to check out our favorite clean eyeliners of all time.
Advertisement
The classic line

Advertisement
Hands down, before you attempt to tackle more stylish eyeliner techniques, you need to master the classic line. This is simply following your lash line from your inner to outer corners whether on the upper or lower lid. Classic lines pair well with liquid, pencil, and gel liners. But the real trick is mastering the art of lining your lids without pulling on them.
If you're still mastering the classic line, using a pencil, liquid liner, or gel, start by making small dashes along your lid line as close to the base of your lashes as possible. Then go back and slowly fill in the spaces, being sure to maintain the same width as your initial dashes.
No-fail pro tips:
- While stretching your lids can create a smoother, taut application surface—especially when using pencils—in the long run, you can create premature sagging. Do your best to stop this bad habit.
- Opt for eyeliners that won't drag across your skin—we like gels, liquid liners with angled tips, or felt-tip liquid liners. Jamie Greenberg, the founder of Jamie Makeup, recommends that you "take the side of the liquid eyeliner applicator and stamp it one end at a time until connected."
- Geoffrey Rodriguez, a celebrity makeup artist (MUA), notes that stability is essential. "First and foremost, applying the perfect line is all about an easy, flowing wrist movement; therefore, it's very important to have a steady hand. Try sitting in front of a (lighted magnifying) mirror with your elbow resting on a table so that your wrist has the freedom to move easily. This will provide more stability, control, and a flowing motion."
Advertisement
Cat-eye

The cat-eye is a classic liner technique that can make your eyes look lifted. It builds on the classic eyeliner by adding a small upward flick just past the outer corner of your eyes. In a perfect world, you can create this look in one clean glide over your eye. But if your flick isn't lining up properly or lacks that signature thick to thin angle, try applying your line in two steps.
Begin with the core line from the inner to outer corner—being sure to stop at your outer corner. Next work from out to in. Be intentional and decide where you want your flick to stop. Draw downward until you connect with the end of the line you drew at your outer corner. Then with small strokes, fill in where needed on the eye, adding in more depth and thickness where you want.
Advertisement
No-fail pro tips:
- Much like our tip above, don't pull the lid, especially if you have hooded eyes: The wing or flick you're attempting for a cat-eye, wing, or even a geometric line won't look right and may get lost in the fold.
- A traditional cat-eye isn't as dramatic as a wing. So, you can stay closer to your outer corner as long as the flick is pointed upward.
- Felt-tip liners are the easiest option for applying a cat eye as you can simply lay the tip against your eye. The tips are usually tapered with a pencil-thin drawing end, allowing you to achieve the perfect angled flick with a simple press against your lid.
- If you smudge the flick, you can easily clean any mistakes with concealer and a liner brush. But always be sure to start small and build: It's so much easier to apply more liner than it is to remove it.
- Reverse cat-eye may be easier to achieve as you're simply following along your lower lash line and continuing the line past your outer corners.
Wing-tip
Advertisement
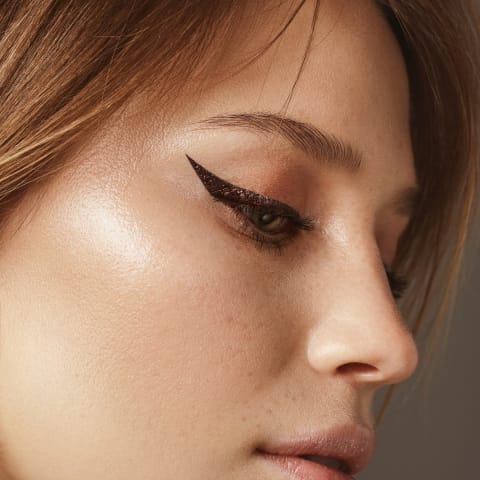
Winged liner is applied exactly like a cat eyeliner and works well with all eyeliner products. The biggest difference is that wings tend to be more dramatic and can be exaggerated in length and height depending on your tastes. So follow the above steps—with just a bit more product and verve.
However, people with hooded or monolids will have the sharpest learning curve with wings and cat-eyes. The natural shape of your eye can make the flick or wing get lost in the fold of your eyelid. Your natural inclination is to turn your head to the side with your eye closed while facing your mirror to draw the wing. (And for most eye shapes this should work fine.) But people with hooded or monolid eyes should avoid this and instead, face forward. Emily Rudman, former makeup artist and founder of Emilie Heathe, notes that "for hooded eyes, you want to make sure you have the eyes open when doing the eyeliner. You can dot the outline for the line you will create and then fill in the line." While the upper line of the wing might look "incomplete" with a slight dip when your eyes are closed, it'll look perfect when your eyes are open as the "dip" is hidden by the hood of your eyelid.
No-fail pro tips:
- A wing can be achieved with any kind of eyeliner, but liquid and felt-tip liner pens with tapered brush heads often provide the best precision.
- If you're concerned about smudging—a common problem for applying eyeliner to monolids—opt for a waterproof liner.
- Victoria Stiles, a celebrity MUA and creative director of ShikSona Beauty, notes that first aid tape makes an excellent stencil for wings. "Cut two 2-inch pieces of tape. Place them under the bottom lash line in the outer corner of each eye, pointing them diagonally upward toward the temples of the face," she says.
Smoky liner
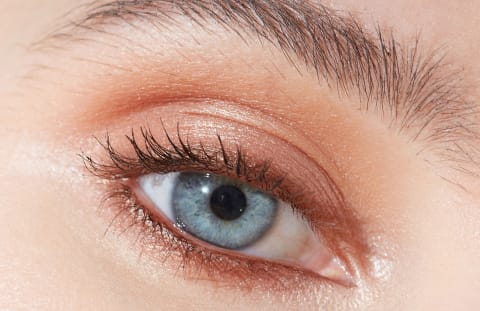
Smoky eyeliner simply means that you're smudging out the liner—primarily in the under-eye and outer corners. For this eyeliner trick, you might find that you'll need to use multiple eyeliner products or even eyeshadow depending on your preference. The application process is actually going to be similar to a cat-eye, but you're also going to line your under-eye.
For example, you might use a liquid liner to create the upper eyelid, but then use a pencil, shadow, or gel liner to create the under-eye line and cat-eye flick. Once applied, smudge the lower line and the flick, which creates that smoky look.
No-fail pro tips:
- Opt for a smudge brush to create that perfect intentional smudge effect on the under-eye.
- Gel, pencil, and kohl liners are ideal for smoky lines because these products are easily smudged.
- If you want to take a smoky liner to a smoky eye, just add a nice gradient of shadow on the lid, paying special attention to the crease.
Under-eye

Depending on your preferences and overall makeup look goals, you may feel like an under-eye line is unnecessary. (Obviously, for a smoky eye, the under-eye line is essential.) But in many cases, you can skip it. As a general rule, liquid liner—including a felt-tip liner—isn't a good choice for this line as the liquid can easily get in your eyes before it dries down and sets. Typically pencils, gels, and even eyeshadow are better choices for this look. Similar to the classic eyeliner, you're going to follow the shape of your under-eye as close to the lash line as possible.
No-fail pro tips:
- Make eyes look bigger by sticking to lighter colors.
- Darker hues are great for a dramatic effect.
- Especially with dark shades, avoid lining the full length of your under-eye to prevent the liner from making your eyes look smaller.
- For eyeshadow as an under-eye line, apply it using an angled liner brush.
Waterline/tightline technique

Once you've mastered the basics of lining your under-eye, the next natural progression is to line your waterline—also known as "tightlining." It can be used on both upper and lower. Similar to regular under-eye lining, tightlining or waterlining is best paired with pencils whether traditional or gel. Because you're applying product directly next to the eye, liquid liners are a bad choice. With waterlining or tightlining, you're applying eyeliner inside the lash line. This technique is most often used in two ways: paired with smoky eyes for a more dramatic effect or with a lighter, pearly color to make eyes pop.
And it's one of the few times when you should pull on your lid (whether upper or lower) during the application process because you need to expose the little bit of skin between your lashes and your eye. Jessica Richards, founder of Shen Beauty, notes that pencils are perfect for this technique. "When using a pencil, the best method is to trace the pencil through your lashes. This gives a tightline effect and smoldering finish."
No-fail pro tips:
- Always pay special attention to ingredients here—and avoid things like PFAS—because the product will sit directly next to your eye, which is considered one of the most absorbable areas of the body.
- Use a white or light liner if you want to make your eyes look larger.
Extra eyeliner hacks
There's nothing wrong with finding a hack that makes life just a bit easier. And these eyeliner application hacks are great for any beauty—whether a novice or a pro—to use.
The eyeliner stamp trick
Tonya Mann, an MUA and health and beauty expert, notes that soft pencils are great for first-time eyeliner wearers. But if shaky hands are a struggle, she recommends the following: "Apply pencil liner along the back edge of your eyelash curler. When you press it against the base of your lashes to curl them, it automatically deposits the liner exactly where you want it. It won't be perfect, but it does give you a really great starting point to work from."
Tackle the more difficult eye first
It's no secret that most people struggle to achieve a perfect wing or cat-eye on both eyes. Denise Dixon, a longtime cosmetologist and founder/CEO of the accredited beauty school Cosmetology Institute of Las Vegas, notes, "I usually advise them to start with the eye they have the most trouble with; this saves time from trying to get the less dominant eye to look absolutely perfect as the dominant side. This method also helps you practice on your less dominant side and makes you focus on getting it as right as possible."
Angles matter
The angle you hold your felt tip eyeliner at will affect how thick the lines appear. NeeziieBabiie, a celebrity MUA and founder of NeeziieBabiieBeauty, recommends "The more parallel the tip is to the eye, the thicker the eyeliner will be applied. It helps to angle the felt tip at 45 degrees and apply the tip lightly but with intention. This will allow you to apply a tight line across."
The takeaway.
Eyeliner is a makeup mainstay—of course, that doesn't mean everyone finds it easy. In fact, certain eye looks (looking at you, winged eye!) can prove quite the challenge. However, with this guide and expert tips, we're sure you can master whatever look you aim to achieve.

Dorian Smith-Garcia is a diverse writer across beauty, fashion, travel, parenting, consumer goods, and tech. She has written for Inverse, Healthline Parenthood, The Confused Millennial, XONecole, Glowsly, and The Drive along with a variety of other publications. She is a bridal and beauty expert/influencer and the creative director behind The Anti Bridezilla. When Dorian's not writing she's collecting stamps in her passport, learning new languages, or spending time with her husband and daughter.

